Bullfix provides an innovative solution for achieving strong and secure mounts in drywall. By utilising these heavy-duty fixings, you can confidently hang items ranging from shelves to heavier fixtures without the risk of failure. This guide will walk you through the process of installing Bullfix fixings properly to ensure optimal safety and durability. Following these steps will help you prevent any potential accidents and ensure that your mounted items stay in place.
Key Takeaways:
- Ensure proper drill hole size for secure fitting and maximum weight support.
- Use the correct type of screwdriver to prevent damage during installation.
- Verify wall type and load capacity to choose the appropriate Bullfix fixing for the task.
 Understanding Bullfix Heavy Duty Drywall Fixings
 Understanding Bullfix Heavy Duty Drywall Fixings
Bullfix heavy duty drywall fixings have been engineered specifically for securely attaching fixtures to drywall, ensuring stability and safety. These fixings are ideal for supporting heavier items, such as shelves, televisions, and cabinetry, allowing you to utilise wall space without the fear of collapse. With a robust design, they distribute weight evenly across a larger surface area, making them a reliable choice for any mounting project.
What are Bullfix Drywall Fixings?
Bullfix drywall fixings are specialised anchors designed for use in drywall environments, offering superior strength and holding power. They feature a unique mechanism that expands within the wall cavity when installed, providing a solid grip that allows for the support of substantial loads. Available in various sizes and strengths, these fixings are suitable for a wide range of applications, from light fixtures to heavy shelves.
Benefits of Using Bullfix Heavy Duty Fixings
Utilising Bullfix heavy duty fixings can significantly enhance your mounting projects through their unmatched load-bearing capabilities. They streamline installation by simplifying the fixing process while ensuring that your fixtures remain firmly in place. This not only promotes safety but also extends the lifespan of your wall installations.
One significant advantage of Bullfix fixings is their load rating; they can typically support weights that exceed 100 kg, making them preferable for heavier items. Additionally, the installation process eliminates the need for additional support beams or complex structural reinforcements, saving you both time and expense. With a variety of options tailored to specific needs, you can achieve a secure and professional finish, enhancing both functionality and aesthetic appeal in your space.
How to Prepare for Installation
Preparing for installation is vital for ensuring a secure mount. Begin by selecting your desired location and clearing the area of any obstructions. Conduct a thorough inspection of the wall surface to identify any potential issues. Check for plumbing and electrical lines behind the wall before drilling, as this will prevent accidents and potential damage. Proper preparation will make the installation process smoother and more efficient.
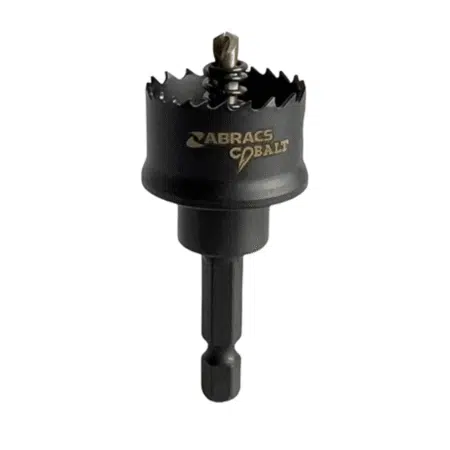
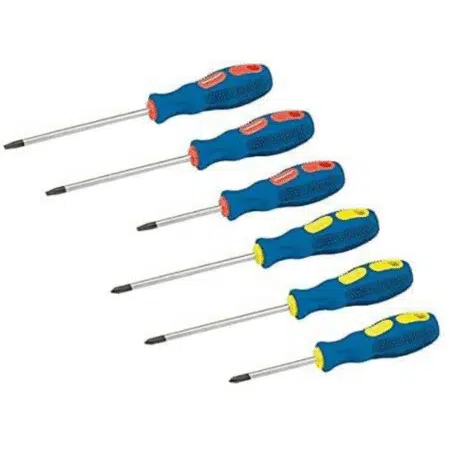
Tools and Materials Needed
You will require a specific set of tools and materials for a successful installation. Essential items include a drill with the appropriate drill bits, a screwdriver, Bullfix heavy-duty drywall fixings, a level for accuracy, and a measuring tape to ensure precise placement. Having these tools on hand will facilitate a hassle-free process and contribute to a secure mounting.
Assessing Your Wall Type
 Assessing Your Wall Type
Understanding the type of wall you are working with is vital for choosing the right fixings and techniques. Different wall materials, such as plasterboard, masonry, or concrete, require varying approaches for installation. Incorrect assessment can result in inadequate support for your mounted items, leading to potential damage and safety hazards.
To effectively assess your wall type, conduct a simple tap test—gently knock on the wall with your knuckles. A hollow sound typically indicates a plasterboard structure, while a solid sound suggests masonry or concrete. Plasterboard requires specific drywall fixings, whereas masonry may need heavier-duty anchors. Additionally, knowing your wall type helps in determining the correct drill bit size and installation depth, ensuring long-lasting support.
Step-by-Step Installation Guide
| 1. Mark the installation points | 2. Choose the right drill bit |
| 3. Drill holes accurately | 4. Insert Bullfix fixings |
| 5. Attach your fixture securely | 6. Test the strength of the installation |
Marking the Installation Points
Begin by identifying the desired location for your fixture, ensuring it aligns with your layout. Use a level to draw light pencil lines, marking precise points where the fixings will go. This attention to detail will ensure your installation is straight and effective, providing a stable base for whatever you mount.
Installing Bullfix Fixings Correctly
To install Bullfix fixings correctly, it’s vital to drill holes that are the right size according to the product specifications. Insert the fixing into the hole until it clicks into place, ensuring it is flush against the wall. This method guarantees a tight fit and maximises load-bearing capabilities.
When inserting the fixings, ensure you adopt a gentle twisting motion to help the mechanism expand properly within the wall cavity. Pay close attention to the depth of your drill hole; it should match the fixing length for optimal security. Once installed, double-check the surface is even, and use a screwdriver to tighten until secure. This technique maximises the structural integrity of your fittings.
Tips for Ensuring Secure Mounting
 Tips for Ensuring Secure Mounting
To achieve a solid and dependable mount, always choose the right Bullfix Heavy Duty Drywall Fixings for your specific needs. Ensure that you drill a clean hole, free from dust or debris. Verify that the fixing is correctly aligned and adequate for the weight of the object being mounted. Additionally, make use of a spirit level to maintain straightness. Finally, double-check the manufacturer’s specifications for load limits. Assume that precise installation will lead to longevity and stability.
Tips for Heavy Loads
When mounting heavy items, such as shelves or large mirrors, it’s necessary to select fixings designed to bear significant weight. Use multiple fixings to distribute the load evenly. You should also consider the thickness of your drywall; thicker drywall may require different mounting methods. Always ensure that you understand the weight capacity of your chosen fixings. Assume that proper load distribution will prevent future accidents.
Avoiding Common Mistakes
Avoiding common mounting mistakes can save you time and potential damage to both your wall and the item you’re mounting. One common error is not adequately checking the wall type; different walls may require specific fixings. Installing too close to the edge of the drywall can lead to weak support. Additionally, ensure that you aren’t overloading your fixings, as this can cause failures. Above all, don’t skip the step of testing your fixings before fully hanging your item. This diligence will ensure a secure and lasting installation.
Factors to Consider for Optimal Performance
To ensure the full potential of Bullfix Heavy Duty Drywall Fixings, assess the surface type, the weight of the item being mounted, and the surrounding environment. Use fixings suited for both standard and heavy applications to maximise stability. Additionally, consider the installation depth to achieve the best grip. Thou must also allow for expansion and contraction of materials. When using bullfix heavy duty drywall fixings, it’s important to follow the manufacturer’s guidelines for load capacity. Properly spacing the fixings can further enhance structural integrity, ensuring safety and durability over time. Finally, always inspect the fixings periodically to confirm they remain secure and effective. heavy duty drywall fixings explained provide an essential understanding of the various types of fasteners available for drywall applications. Selecting the right anchors can greatly influence the longevity and safety of the installation. For the best results, always follow the manufacturer’s guidelines regarding weight limits and recommended usage for specific environments.
Weight Considerations
Evaluate the weight of the items you plan to mount, as it significantly influences the selection of fixings. Each Bullfix fixing is rated for a specific load, so ensure you choose one that matches or exceeds your item’s weight. Proper load distribution is vital to prevent failure. Always verify if you need additional supports for extremely heavy items.
Environmental Factors
Your mounting process can be affected by environmental factors such as humidity, temperature variations, and exposure to moisture. Fixings in moist conditions may require additional protective coatings or water-resistant materials to maintain long-term integrity. Isolate areas subject to condensation to reduce risk. Any changes in these conditions can impact the performance of your fixings.
Inclement weather can also affect the materials used, particularly if they are exposed to outdoor elements. Ensure that the environment remains stable, avoiding areas prone to extreme temperature shifts or direct exposure to moisture. Additionally, regions with heavy vibrations or movement should utilise enhanced fittings. Any oversight in this aspect could lead to accidents and compromised installations.
- Use weather-resistant materials to prevent corrosion.
- Account for humidity levels in your mounting area.
- Assess the impact of temperature fluctuations on the fixings.
- Any adjustments you make can strengthen your installation.
Maintenance and Inspection
 Maintenance and Inspection
Regular maintenance and inspection of Bullfix Heavy Duty Drywall Fixings are important for ensuring their ongoing performance and safety. By routinely checking the secure integrity of the fixtures and monitoring for any signs of wear or looseness, you can preempt possible hazards and maintain the integrity of your mounted items.
Regular Checks
Conduct regular checks every six months or after heavy use of the mounted items. Look for any signs of shifting, cracks in the drywall around the fixings, or unusual movement. If the fixings feel loose or you observe degraded materials, it’s time to take further action to ensure safety.
When to Replace Fixings
Replace fixings immediately if you identify any structural damage, corrosion, or they have been compromised during removal and reinstallation. Additionally, if the load being supported exceeds initial expectations or has changed, a replacement may be necessary to maintain safety.
It’s advisable to replace fixings every few years, even if no visible damage is present, due to potential material fatigue. If you’ve altered what you’re mounting or increased the weight significantly, assess the fixings to ensure they’re adequate. For example, switching from lightweight shelves to heavier displays may necessitate new fixings that can handle the additional weight. Keeping a close eye on these factors ensures that your installations remain stable and secure over time.
To wrap up
To wrap up, utilising Bullfix Heavy Duty Drywall Fixings ensures that you achieve safe and secure mounting for your fixtures. Always start by selecting the appropriate size for your needs, drilling the correct hole, and inserting the fixing firmly. Ensure that you follow the manufacturer’s guidelines carefully, as this will maximise holding strength and stability. With these steps, you can confidently mount shelves or fixtures, knowing they are well-supported in your drywall.
FAQ
Q: What surfaces are suitable for Bullfix Heavy Duty Drywall Fixings?
A: Bullfix Heavy Duty Drywall Fixings are designed for use with various surfaces such as drywall, plasterboard, and hollow walls. Ensure the surface is clean and free from debris for optimal adhesion.
Q: How do I install Bullfix Drywall Fixings?
A: To install, first mark the desired location on the wall. Drill a hole according to the size of the fixing. Insert the fixing into the hole until flush with the surface, ensuring it is aligned properly. Finally, use the recommended screw to secure your mounting object.
Q: What weight capacity can Bullfix Heavy Duty Drywall Fixings support?
A: Bullfix Heavy Duty Drywall Fixings can support significant weight; typically, they can hold up to 30 kg in drywall when installed correctly. For heavier items, ensure proper spacing between fixings and follow manufacturer guidelines.
Q: Can Bullfix Drywall Fixings be used for outdoor applications?
A: Bullfix Heavy Duty Drywall Fixings are primarily designed for indoor use. For outdoor applications, consider fixings specifically rated for exposure to moisture and varying weather conditions.
Q: How do I remove Bullfix Drywall Fixings without damaging the wall?
A: To remove, gently unscrew the mounting object first. Then, use pliers to grasp the fixing and carefully pull it out of the wall. If any damage occurs, use a filler to repair the hole before repainting.