Painting over Everbuild One Strike Filler can lead to a polished, professional finish when done correctly. To achieve the best results, ensure the filler is fully cured and sanded smoothly before applying paint. Selecting the right primer and paint will enhance adhesion and colour accuracy. This guide will walk you through the steps, ensuring your project not only looks good but stands the test of time.
Key Takeaways:
- Ensure the filler is completely dry and sanded to a smooth finish before applying paint for optimal adhesion.
- Use a high-quality primer to enhance the paint’s durability and richness of colour over the filler.
- Select the appropriate type of paint compatible with the filler and the surface for a seamless professional appearance.
 Preparing the Surface
 Preparing the Surface
Before you begin painting, proper surface preparation is crucial for achieving a flawless finish. Ensure that the area around the filled surface is clear of any dust, debris, or old paint. A clean, smooth surface allows for better adhesion and ensures that the paint application is uniform, which ultimately enhances the overall aesthetic of your project.
Cleaning the Area
Start by cleaning the area thoroughly. Use a damp cloth or sponge to wipe away any dust, grease, or other contaminants. If the surface is particularly dirty, a mild detergent mixed with water can be effective. Allow the area to dry completely before moving forward, as moisture can prevent the paint from adhering properly.
Sanding Techniques
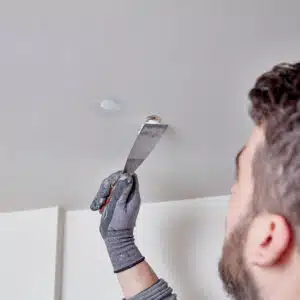
Sanding is vital for creating a smooth surface that will receive the paint evenly. Use fine-grit sandpaper (180-240 grit) to carefully sand the filled area. Focus on feathering the edges of the filler to blend seamlessly with the surrounding wall, which prevents unsightly lines from appearing after you’ve applied paint.
When sanding, employ a circular motion rather than straight lines to ensure an even surface. After sanding, check for any imperfections – they can often be resolved with additional filler. Always wear a mask to avoid inhaling dust, and consider using a sanding block for better control, especially on larger areas. Finally, wipe the surface with a damp cloth to remove any dust particles left behind before proceeding to paint.
Choosing the Right Paint
Selecting the appropriate paint for your project will greatly influence the final outcome. You must consider factors such as the surface type, intended use, and desired finish. High-quality paints designed for interior or exterior use can provide durability and aesthetic appeal. Opt for paints specifically tailored for filler materials to ensure proper adhesion and long-lasting results.
Type of Paint
Whether you choose emulsion, gloss, or satin, the type of paint affects both the look and performance on the filler. For walls, emulsion is usually preferred for a smooth finish, while gloss or satin may be better suited for woodwork and trim due to their durability and sheen.
Color Selection
Your choice of colour should not only enhance the overall décor but also suit the room’s function. Lighter shades can make spaces appear larger and more inviting, while darker tones add depth and sophistication. Consider the lighting conditions in your room, as this can significantly affect how colours are perceived.
When selecting a colour, it’s beneficial to test samples in the room where they will be applied, as natural and artificial light can alter their appearance. Use tester pots to paint small sections and observe them at different times of the day. Additionally, think about complementary colours in your existing furnishings and decor to achieve a harmonious look. Undeniably, colour plays a pivotal role in creating the desired ambience and atmosphere of your space.
Priming the Filler
 Priming the Filler
Before painting over Everbuild One Strike Filler, applying a primer is vital to ensure proper adhesion and a uniform finish. A quality primer can effectively seal the filler, preventing any uneven absorption of paint, which could affect the final appearance. This step is crucial in achieving a professional-looking result.
Importance of Primer
Using a primer not only enhances adhesion but also improves the durability of your paint finish. It helps create a barrier that prevents moisture and contaminants from seeping through, which can lead to peeling or discolouration over time. A primer ensures that the topcoat of paint applies smoothly and appears vibrant.
Application Methods
Applying primer can be done using a brush, roller, or spray gun, depending on your preference and the specific project requirements. For larger areas, a roller or spray gun may cover more surface quickly, while a brush allows for greater control in intricate or detailed sections.
When using a brush, opt for a synthetic bristle variety, as it works well with water-based primers. Rollers can speed up the priming process on flat surfaces, ensuring even coverage. If you choose to spray, maintain a consistent distance from the surface, applying thin coats for best results. Always allow the primer to dry completely as per manufacturer instructions before proceeding with the paint application for optimal performance.
Painting Over the Filler
Once your Everbuild One Strike Filler has dried thoroughly, you can begin the painting process. Ensure the surface is clean and any dust is removed. It’s advisable to apply a primer first, particularly if you’re working with a lighter paint over a darker filler. This helps achieve an even colour, ensuring a professional finish when the topcoat is applied.
Tools Needed
Your toolkit should include a high-quality primer, paintbrushes, rollers, a paint tray, sandpaper, and a clean cloth. A good brush will help you reach corners and edges, while a roller is ideal for larger areas, allowing for a smooth application.
Painting Techniques
Employing the right painting techniques is key to a professional finish. Start with primer application, using even strokes to prevent drips. Once dry, lightly sand any rough areas, and then apply your topcoat using a roller for larger areas and a brush for edges, ensuring consistent coverage.
Utilising a two-coat method can enhance the opacity and durability of your paint. After applying the primer, allow it to dry completely, then sand it lightly to create an ideal surface for the topcoat. When applying paint, work in sections, maintaining a wet edge to avoid visible lines. For a truly professional look, consider using a paint conditioner that improves flow and reduces brush marks.
Achieving a Professional Finish
 Achieving a Professional Finish
For a professional finish, meticulous attention to detail is necessary at every stage of the painting process. Start by ensuring the filler is perfectly smooth and fully cured, as imperfections will be magnified once the paint is applied. Using quality tools, such as brushes and rollers, will also enhance the overall appearance. A methodical approach with careful layering of paint will yield the best results, culminating in a polished look that stands the test of time.
Layering and Drying Time
Apply paint in thin layers to avoid drips and achieve an even coverage. Allow each layer to dry completely, which typically takes a few hours depending on the paint type and environmental conditions. This patience during the drying process will significantly contribute to the overall quality of your final finish.
Final Touches
Once the final layer of paint is dry, inspect your work for any imperfections that may require touch-ups. These final adjustments can make a world of difference, so take care to rectify any flaws in both the paint and the edge work. Using a fine brush for these areas ensures a clean and professional look.
Paying attention to the final touches can elevate the entire project. Examine corners and edges closely, as these areas often reveal whether the job was completed professionally. If necessary, use a small artist’s brush to apply additional paint or filler for seamless transitions. Additionally, consider a gently sanding between final coats for an ultra-smooth finish. Always step back and view the work from different angles to ensure consistency across the surface, confirming an impeccable outcome that impresses upon completion.
Common Mistakes to Avoid
When painting over Everbuild One Strike Filler, several pitfalls can mar your professional finish. Awareness of these common mistakes enables you to ensure a smooth application and lasting results. From neglecting surface preparation to mismanaging drying times, each error can severely impact your finished project’s appearance.
Poor Preparation
Skipping thorough surface preparation is a significant oversight. You must clean the area, remove dust, and ensure the filler is fully cured. Failure to do so can lead to poor adhesion, resulting in the paint peeling or chipping away over time.
 Ignoring Drying Times
 Ignoring Drying Times
Underestimating the importance of abiding by specified drying times can undermine your efforts. Each layer of filler and paint has a recommended drying period, which must be adhered to for optimal results.
Adhering to drying times is vital to achieving a durable and aesthetically pleasing finish. Each coat of filler should be given sufficient time to cure, which is typically around 24 hours, depending on environmental conditions. Rushing the process by painting over inadequately dried filler can trap moisture, leading to bubbling and cracking in your paintwork shortly after application. For best results, consult the product instructions and maintain a consistent room temperature to foster even drying throughout the process.
To wrap up
To achieve a professional finish when painting over Everbuild One Strike Filler, ensure that the surface is properly prepared and fully dried before applying primer and paint. Opt for a high-quality primer to create an ideal base and choose a paint that matches your desired finish. Apply multiple thin coats rather than one thick layer to avoid drips and ensure even coverage. With patience and attention to detail, you will enhance the aesthetics of your project and achieve a seamless result.
FAQ
Q: Can I paint directly over Everbuild One Strike Filler?
A: Yes, you can paint directly over Everbuild One Strike Filler once it has fully dried. It is important to ensure the surface is clean and free from dust or debris before applying paint.
Q: What type of paint is best to use over Everbuild One Strike Filler?
A: Using an emulsion paint or a high-quality acrylic paint is recommended for painting over Everbuild One Strike Filler. These types of paint provide good adherence and a smooth finish.
Q: How long should I wait before painting over Everbuild One Strike Filler?
A: It is advisable to wait at least 24 hours after applying Everbuild One Strike Filler before painting. This allows sufficient time for the filler to cure and harden properly.
Q: Should I sand the filler before painting?
A: Yes, sanding the filler lightly with fine sandpaper is beneficial for achieving a smooth surface. This helps the paint adhere better and results in a more professional finish.
Q: Is priming necessary before painting over Everbuild One Strike Filler?
A: Priming is not strictly necessary, but applying a suitable primer can enhance paint adhesion and ensure an even finish, especially if you are painting with a matte or low-sheen paint.