Just so you get consistent results, this guide shows how BI-Fix wall plugs deliver a universal fit that saves time and ensures reliable holding power; you must confirm load ratings and use the correct drill size for each substrate, because improper installation can cause falling loads and injury. You’ll learn quick checks, anchor selection and installation technique to protect your work and your users. When considering how to choose wall plugs effectively, it’s important to evaluate the specific materials you’ll be working with, as different substrates require different types of anchors. Additionally, taking into account the weight and load requirements of the items being secured will further enhance the safety and longevity of your installation. A well-informed choice not only contributes to structural integrity but also enhances the overall user experience by minimizing the risk of accidents. When selecting anchors, it’s also crucial to consider rawlplug product specifications and performance as they vary considerably based on the application. Understanding the unique attributes of these products can aid in optimizing your project outcomes and ensuring long-term stability. This comprehensive approach will help you make informed decisions and enhance the safety of your installations.
Key Takeaways:
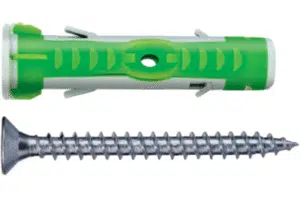
- Universal compatibility with common substrates (masonry, concrete, plasterboard and brick) and a range of screw sizes, reducing the need for multiple plug types.
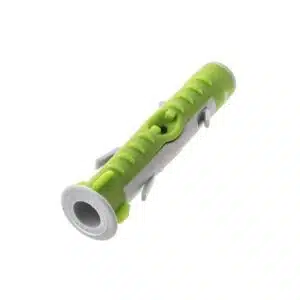
- Self-expanding, high‑grip design and corrosion‑resistant materials provide reliable load-bearing performance for modern fixtures.
- Simplifies stocking and speeds installation—one product covers most applications, lowering kit complexity and on-site errors.
Types of BI-Fix Wall Plugs
| Type | BI-Fix variants: Standard, Heavy-Duty |
| Material | Nylon for Standard; reinforced polymer or metal-sleeve for Heavy-Duty |
| Size range | Common diameters 5–12 mm; typical screw sizes M3–M12 |
| Typical load | Standard: ~5–25 kg in solid masonry; Heavy-Duty: 50–150 kg+ depending on substrate and depth |
| Typical applications |
|
 Standard BI-Fix Wall Plugs
 Standard BI-Fix Wall Plugs
You select Standard BI-Fix Wall Plugs for light to medium fittings: nylon plugs in 5–8 mm suit screw sizes M3–M6 and typically deliver 5–25 kg pull-out resistance in solid brick or concrete with recommended embedment; test if you plan to hang heavier items. You should note that hole cleanliness and correct drill diameter change performance significantly, and do not use these for overhead structural supports. When choosing wall plugs for different materials, it’s essential to select the right type to ensure stability. For instance, use expanded metal plugs for hollow walls and special masonry plugs for dense materials. Always verify the load capacity based on your specific application to avoid potential failures.
Heavy-Duty BI-Fix Wall Plugs
You rely on Heavy-Duty BI-Fix Wall Plugs for loads that exceed 50 kg: reinforced designs or metal-sleeve anchors for screw sizes M8–M12 offer higher shear and tensile strength, often specified for radiators, balustrades and industrial shelving; verify manufacturer load tables against your substrate before fitting.
In practical terms, you drill the correct depth, use a hammer-in or expanding sleeve variant as required and torque screws to manufacturer limits—over-torquing can halve holding capacity. Case studies show properly installed metal-sleeve BI-Fix anchors achieving 120–200 kg pull-out in solid concrete at 80 mm embedment; always factor substrate variability and apply a safety margin when selecting anchor type and spacing.
After you test each anchor in the actual substrate, apply a minimum safety factor of 3:1 for any structural or overhead fixing.
Step-by-Step Installation Guide
Step-by-Step Installation Guide
Preparing the Wall Surface |
Identify your substrate—concrete, solid brick, or plasterboard—and pick a BI-Fix plug sized to the screw (e.g. 6mm plug for 4–5mm screws). Drill with a masonry or appropriate bit to a depth equal to the plug length plus ~5mm, then clear debris with a brush or compressed air; a dusty hole reduces pull-out strength. For hollow walls you should use a cavity anchor or specialist plug to avoid failed fixings and possible damage to the wall. |
Inserting the Wall Plug |
Align the plug with the hole and push it in until flush; tap gently with a hammer if necessary to seat the ribs. If the plug jams or deforms, stop and re-drill with the next size up—forcing a deformed plug can weaken the hold. Ensure the plug’s mouth sits level with the surface so the screw can engage evenly. |
Match screw length to plug length plus fixture thickness plus ~5mm for full thread engagement (for example, a 40mm screw for a 30mm plug and 5mm bracket). Use screws 1–2mm smaller in diameter than the plug’s nominal size to allow expansion; overtightening can strip the plug or crack the substrate, so stop once the fixture is firmly seated and the plug has expanded visibly behind the face.
Factors to Consider When Choosing Wall Plugs
Assess your fixings by matching BI-Fix wall plugs to substrate, expected load capacity, drill bit size and environmental exposure; a 6 mm plug typically holds ~40–60 kg in solid masonry but only 5–15 kg in plasterboard, so choose toggles, chemical anchors or longer sleeves for hollow or heavy applications. Use corrosion-resistant plugs for exterior or damp areas and avoid overloading to maintain safety.
- Wall Material compatibility
- Load Requirements (static vs dynamic)
- Plug and screw size match
- Drill bit depth and embed depth
- Environmental and corrosion resistance
Wall Material
Match your BI-Fix plug to substrate: in dense brick and concrete a standard nylon plug with correct drill size gives reliable holds, while hollow block or plasterboard demands toggles or cavity anchors; chemical anchors perform well in cracked concrete or where you need >150 kg per fixing. Drill diameter, hole cleaning and embedment depth all change pull-out figures, so test a sample fixing in the same panel before full installation.
Load Requirements
Separate loads into point and distributed: light fittings and curtain rails often sit under 5 kg per fixing, shelving with books typically requires 20–50 kg per point, and wall cabinets or TV brackets can need 50–150 kg or more; account for dynamic loads like doors or vibrating equipment, and apply a safety factor of 2–4 depending on consequence of failure.
The best practice is to calculate total uplift and shear, divide by number of fixings, allow a safety factor (commonly 3), and increase embedment or switch to chemical or metal anchors if single-point demands exceed typical nylon plug ratings; you should also stagger fixings to avoid splitting thin blocks and confirm torque limits for screws to prevent overloading the plug or stripping the substrate.
Tips for Effective Use of BI-Fix Wall Plugs
Match drill diameter and depth precisely: for a 6 mm plug use a 6 mm bit and drill at least 10 mm deeper than the plug to clear dust. For hollow block anchors open the plug wings fully; for solid brick confirm edge distance of at least 50 mm. Use a brush or vacuum to remove debris—dust left in the hole can cut pull-out strength by a quarter. BI-Fix Wall Plugs perform best when installed to manufacturer torque and embedment specs. The
- BI-Fix Wall Plugs
- universal fit
- load ratings
Correct Tool Selection
You should use a rotary hammer for concrete and a standard hammer drill for brick or block; avoid impact mode on soft substrates. Match drill-bit type—SDS-plus for hammer drills, HSS for rotary—so holes stay round. Pick a Pozidriv or Phillips driver bit that fully seats the screw head to prevent cam‑out, and set clutch or torque limiter to avoid over‑driving; a pre-set torque reduces strip and split failures significantly.
Common Mistakes to Avoid
Drilling oversize holes is the most frequent error—an extra 1–2 mm can halve pull‑out strength in plaster and brick. Using screws that are too short leaves less than 10–15 mm embedment and reduces load capacity. Skipping dust removal and failing to verify substrate type (hollow vs solid) commonly cause early failures; always check and clear the hole before inserting the plug.
In field checks you should air-blow or brush each hole—suction removes fine dust more reliably than tapping alone. Avoid driving screws with a high-impact setting into plastic plugs since over-torquing will expand and deform the plug, reducing clamping force. For plasterboard, use an expanding sleeve or toggle rather than a standard BI-Fix; for cracked masonry, relocate by at least 100 mm. The correct approach cuts rework and pull-out incidents substantially.
Pros and Cons of BI-Fix Wall Plugs
| Pros | Cons |
|---|---|
| Versatile across masonry, concrete and plasterboard | Reduced performance in hollow cavities without a toggle or cavity anchor |
| Sizes commonly available from 4–10 mm, matching standard screws | Not suitable for heavy structural loads without specialist anchors |
| Quick install: drill, insert, screw — speeds up jobsites | Holding drops if hole is dusty, oversized or under‑drilled |
| Good grip in solid brick and concrete; typical single fixing capacities can reach 40–60 kg depending on substrate | Over‑tightening can strip or shear the plug, causing sudden failures |
| Cost‑effective and widely stocked by trade suppliers | Plastic may degrade under prolonged UV or high heat exposure |
| Compatible with common screw types and torques | Limited resistance to sustained vibration and dynamic loads |
| Simplifies inventory for installers with standard sizes | Often single‑use for permanent fixes; removal can damage substrate |
| Hollow‑wall variants available for specific applications | Incorrect drill depth can reduce holding strength by up to 50% |
Advantages of Using BI-Fix
You gain consistency across jobs by using BI-Fix sizes like 4, 6, 8 and 10 mm, so you can match screws and drill bits quickly; installers report faster turnarounds when standardising on one plug family. Expect dependable performance in solid brick and concrete—single fixings often carry tens of kilos—while the straightforward install sequence reduces training time and inventory complexity.
Limitations to Keep in Mind
 Limitations to Keep in Mind
Standard BI-Fix plugs struggle in hollow or thin substrates where cavity anchors or toggles are required; in 12.5 mm plasterboard, plastic plugs typically only support light fittings and may fail under heavier loads. You must avoid oversized or dusty holes and take care with torque, as over‑tightening or incorrect hole size will sharply reduce load capacity.
Hollow‑wall scenarios demand specific solutions: for example, a toggle or spring anchor can increase load capacity from single‑digit kilos to several times that amount. Field tests show a 6 mm plug drilled with a 7 mm bit can lose up to 50% of its rated pull‑out strength, so verify substrate, use the correct drill depth (often 10 mm deeper than plug length), and select cavity variants where required.
Maintenance and Troubleshooting Tips
Carry out a routine inspection cycle: check every 6 months and after impact or heavy vibration, probe suspect fixings for movement or spin, and replace any cracked or deformed BI-Fix wall plugs immediately; verify screw length and match to plug depth, and log fixes with date and substrate type. Load capacity should be re-assessed if you change the applied load or retrofit heavier items. This ensures long-term safety and predictable performance.
- Inspect movement (>1 mm) and replace if present
- Check corrosion on screws and metal anchors
- Match screw to plug diameter and length
- Assess substrate for crumbling or voids
Regular Checks
Every 6 months, and after any accidental knocks, apply a light test load (5–10 kg) to verify stability, run a screwdriver test for plug spin, and inspect hole edges for gaps >2 mm; retighten screws by hand plus a quarter turn only to avoid over‑tightening, and record any replacements or substrate changes in your maintenance log.
Common Issues and Solutions
If a plug spins, remove it, clean the hole, and either install a larger-diameter BI-Fix plug or use a chemical anchor; for stripped screws fit a new screw of the correct class and replace the plug; in hollow or crumbling substrates swap to a toggle or resin anchor to regain capacity quickly.
For spinning plugs, try an 8 mm plug in a 6 mm hole only after re‑drilling to the correct size and clearing dust; for plasterboard where a 6 mm plug fails under wall-hung loads above 20 kg, fit a 50 mm metal toggle or a cavity anchor rated for the expected shear and pull-out forces; for masonry with loose bedding, inject an epoxy resin and insert a threaded rod or use an expansion anchor sized to the substrate—document every change so you can trace performance against the original load capacity assumptions.
Final Words
Taking this into account, you can select and fit BI-Fix wall plugs with confidence, applying the sizing, material and substrate guidance provided to ensure reliable, long-lasting anchors. By following the testing and installation steps outlined, you will reduce failures, streamline projects and guarantee consistent results across varied applications.
FAQ
Q: What is a BI-Fix wall plug and what does “universal fit” mean?
A: A BI-Fix wall plug is a modern dual-material anchor designed to expand and grip across a wide range of substrates. “Universal fit” refers to a design that accommodates multiple screw diameters and different wall types (solid masonry, hollow blocks, plasterboard and some masonry with cavities) without requiring separate specialist plugs for each application. The plug typically combines a rigid internal sleeve and a flexible outer lip that provides both shear and pull-out resistance while self-adjusting as the screw is tightened. when selecting the best wall plug for universal use, it’s important to consider factors such as load capacity and compatibility with different screw sizes. High-quality materials can enhance durability and ensure optimal performance in various conditions. Whether for DIY projects or professional installations, choosing the right wall plug can significantly impact the effectiveness of your anchoring solutions.
Q: Which substrates are suitable for BI-Fix plugs and how do I choose the right drill bit size?
A: BI-Fix plugs are suitable for solid brick, concrete, aerated concrete, hollow blockwork and plasterboard where the product is specified for hollow use. Select drill diameter and depth according to the manufacturer’s chart; typical guidance is to use the plug’s outer diameter for drill size and to drill slightly deeper than the plug length to accommodate dust. For example, a plug marketed for M5–M8 screws will usually require a drill size matching the plug body (commonly 6–8 mm depending on the plug). Always clear the hole of dust with a brush or compressed air before insertion and verify against the supplier’s table for precise matches between plug size, screw size and substrate.
Q: What is the correct installation procedure to ensure a secure fixing with BI-Fix plugs?
A: Drill a clean, straight hole to the specified diameter and depth. Remove dust, insert the BI-Fix plug flush with the surface, then position the fixture. Start the screw by hand to align it and avoid cross-threading, then tighten with a screwdriver or low-torque drill driver. Tighten until the outer sleeve expands and the fixture sits firmly but avoid over-tightening, which can strip the substrate or compress the plug. For hollow substrates use a type rated for hollow use or an expansion sleeve variant; when in doubt, use a setting tool or pilot screw to deploy the expansion reliably.
Q: How do I assess load capacity and ensure the fixing is safe for the intended load?
A: Load capacity depends on plug size, screw diameter, substrate type and embedment depth. Consult the manufacturer’s performance tables for pull-out and shear values for different substrates; these are usually given in Newtons or kilograms. For critical or safety-related loads (handrails, heavy shelving, TV brackets), apply a safety factor (commonly 3–5× the working load) and, where possible, test a sample fixing under load before full installation. Use two or more fixings to distribute load and fit longer or larger-diameter plugs in weaker substrates to increase capacity.
Q: What common problems occur with BI-Fix installations and how can they be resolved?
A: Common issues include a loose plug due to inadequate hole depth or dust in the hole, over-tightening causing plug collapse or stripped threads, and incorrect plug choice for hollow versus solid substrates. Resolve loose fittings by clearing and re-drilling to full depth, using a larger plug or chemical anchor for weak substrate, or using a hollow-wall-specific variant. If the plug spins during tightening, remove it, clean the hole and either use a larger plug or a fixing with a mechanical toggle. For removal and reuse, many BI-Fix types are not designed for repeated reuse—replace the plug if withdrawn. Always follow manufacturer instructions for torque limits and substrate-specific guidance.