Most DIY enthusiasts face the challenge of securely hanging heavy items on hollow wall plasterboard. This guide will equip you with the knowledge to effectively use spring toggles, which are designed to provide robust support for your fixtures. You will learn about the correct installation techniques, the tools required, and tips to ensure optimal safety while handling heavy loads. By following these steps, you can confidently enhance your living space without compromising structure integrity.
Key Takeaways:
- Spring toggles provide a strong anchor for heavy items in hollow wall plasterboard.
- Proper installation requires ensuring that the toggle is fully expanded inside the wall cavity.
- Assess the weight of the item being hung to determine the appropriate size and number of fixings needed.
 Types of Spring Toggles
 Types of Spring Toggles
Understanding the different types of spring toggles is necessary for selecting the right fixings for your project. Each type has specific applications and weight capacities, crucial for ensuring secure installations on hollow walls. Generally, spring toggles fall into two categories: standard and heavy-duty, each designed to meet varying load requirements.
- Standard spring toggles are suitable for lighter items.
- Heavy-duty spring toggles can support considerably more weight.
- Materials used may vary between types, affecting durability.
- Installation methods differ slightly for each type.
- Consult load ratings to ensure safety and effectiveness.
After understanding these types, you are better equipped to choose the correct option for your specific needs.
| Standard Spring Toggles | For lighter fixtures, typically supporting up to 30kg. |
| Heavy-Duty Spring Toggles | Designed for heavier loads, often exceeding 30kg. |
| Installation Difficulty | Standard toggles are easier for DIY projects. |
| Material | Standard toggles usually made of zinc; heavy-duty may use higher grade steel. |
| Applications | Standard for shelves; heavy-duty for large mirrors or TVs. |
Standard Spring Toggles
Standard spring toggles are ideal for hanging lightweight items, such as picture frames or small shelves. Typically rated for loads up to 30kg, they provide adequate support without overwhelming the wall structure. You’ll find these fixings straightforward to install, requiring only a small hole for insertion, allowing for efficient DIY projects without the need for professional assistance.
Heavy-Duty Spring Toggles
Heavy-duty spring toggles cater to the need for strong support, designed for appliances such as large mirrors or televisions. With weight capacities often exceeding 30kg, they boast robust construction and larger toggle wings, ensuring stability and reliability. You’ll notice their installation involves slightly more effort, but the enhanced safety for heavier items makes it worthwhile.
Heavy-duty spring toggles are engineered with stronger materials and broader wings, spreading the load over a larger surface area within the plasterboard. This design significantly reduces the risk of failure under heavy loads. Installation requires precise drilling, but once in place, they offer exceptional holding strength, making them ideal for securing valuable fixtures or mounting heavy equipment. Proper selection based on specific load requirements ensures that your installations are not just safe but also durable.
Factors to Consider
- Weight of the item
- Wall material and thickness
- Fixing type compatibility
- Installation process
The selection of the appropriate spring toggles largely depends on several key factors that ensure secure and reliable fixing.
 Weight of the Item
 Weight of the Item
The weight of the item being hung dictates the load-bearing capacity required from your spring toggles. Each toggle has a specific weight limit, often indicated on the packaging. For instance, standard toggles can typically support up to 20 kg, while heavy-duty options may accommodate 30 kg or more. Knowing your item’s weight helps avoid potential falls and damage.
Wall Material and Thickness
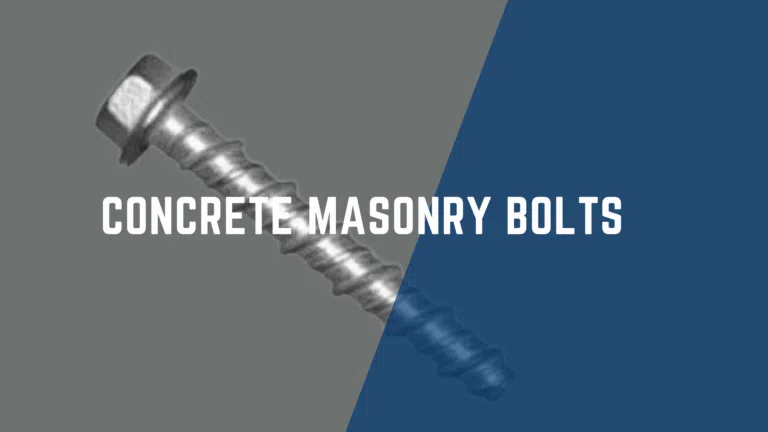
Your wall’s material and its thickness are significant when choosing the right spring toggle. Plasterboard varies in thickness, usually ranging from 9.5 mm to 15 mm. Some toggles are specifically designed to work effectively within these dimensions. Using a toggle not suited for your wall type can lead to inadequate support or damage.
Consider that different wall materials, such as plasterboard versus concrete, affect the anchor’s performance. For plasterboard, spring toggles may provide the best hold due to their design, while masonry walls may require heavier fixings. Always verify that the toggle is adequate for your wall’s construction, ensuring optimal performance under weight stress.
Step-by-Step Installation Guide
| Tools and Materials Needed | You will require a drill with a masonry bit, spring toggles, a screwdriver, a measuring tape, a level, and a pencil for marking. Ensure you also have your chosen heavy item ready for mounting. |
| Installation Process | Begin by marking the placement of your item on the wall. Drill a hole through the plasterboard to accommodate the spring toggle, allowing ample space for the toggle to expand. Insert the spring toggle into the hole and tighten securely to ensure a stable hold. |
Tools and Materials Needed
You will require a drill with a masonry bit, spring toggles, a screwdriver, a measuring tape, a level, and a pencil for marking. Ensure you also have your chosen heavy item ready for mounting.
Installation Process
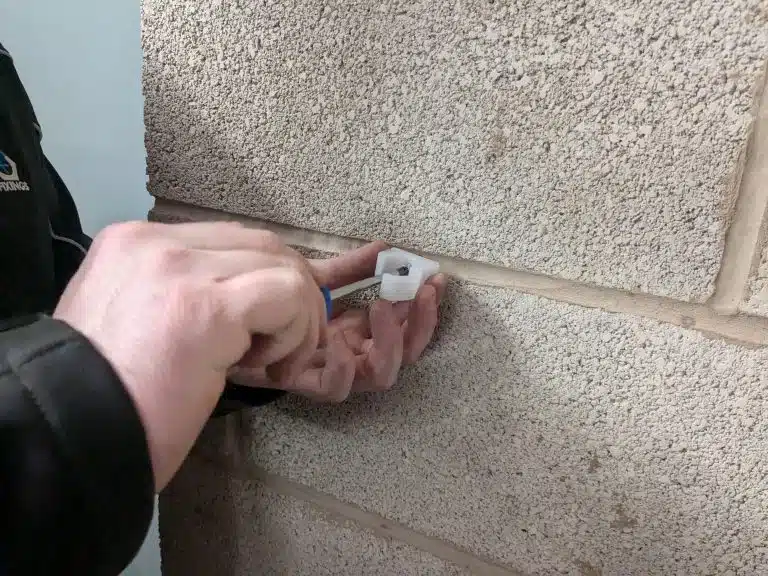
Begin by marking the placement of your item on the wall. Drill a hole through the plasterboard to accommodate the spring toggle, allowing ample space for the toggle to expand. Insert the spring toggle into the hole and tighten securely to ensure a stable hold.
Start by measuring and marking the desired height for your item, then check for level alignment. Drill a hole deep enough to allow the toggle to fully expand behind the wall. After inserting the toggle, pull the screw until you feel resistance, indicating a secure fit. Always test the strength of the fixing before fully hanging your item to ensure safety and stability.
 Tips for Successful Installation
 Tips for Successful Installation
Ensuring a successful installation of spring toggles in your hollow wall plasterboard can significantly enhance the strength and durability of your fixtures. Adhere to these tips for optimal results:
- Choose the appropriate spring toggle type for your load.
- Use a drill bit that’s the correct size for your toggle.
- Always check the load capacity specified by the manufacturer.
- Make sure the plasterboard is not compromised in any way.
Thou shall ensure proper preparation for a secure fit.
Pre-Installation Checks
Executing thorough pre-installation checks is vital for a secure outcome. Assess the wall integrity by checking for any signs of deterioration or damage that may weaken the plasterboard. Ensure that you identify and mark the stud locations, as fixing directly into these can provide additional support. Additionally, verify the weight of the items being hung to ensure compatibility with the toggling system selected.
Common Mistakes to Avoid
Avoiding common pitfalls can streamline your installation process and enhance safety. Many users neglect proper wall inspection before installation, leading to inadequate support or even structural failure. Failing to use the correct size drill bit for the toggle can also hinder the installation’s effectiveness. Moreover, overlooking the load capacity specified by the manufacturer may result in hanging items too heavy for the fixings to support.
Be mindful of the height at which you’re installing your items; incorrect positioning can cause uneven weight distribution. Additionally, neglecting to read the manufacturer’s instructions often leads to improper installation techniques. Ensure you do not overtighten the fixings, as this can damage the plasterboard, creating weak points. By acknowledging these pitfalls, you can significantly improve the success rate of your installations and maintain a safe environment for your heavy fixtures.
Pros and Cons of Using Spring Toggles
Pros and Cons
| Pros | Cons |
|---|---|
| Easy to install | Requires drilling |
| Suitable for hollow walls | Can be less secure than other methods |
| Holds substantial weight | Not ideal for very heavy items |
| Versatile usage | May damage plasterboard upon removal |
| Widely available | Requires proper alignment for effectiveness |
| Cost-effective solution | Risk of breakage if over-tightened |
| Minimal wall damage | Limited to specific wall types |
| Good for light to medium fixtures | Not reusable after removal |
| Fast installation process | Can be tricky in crowded wall spaces |
| Requires minimal tools | Limited weight capacity compared to alternatives |
Advantages
Spring toggles offer numerous benefits for your installation projects. They are easy to install, needing only a drill and minimal tools, making the process swift. Their capacity to hold substantial weight for light to medium fixtures makes them suitable for various applications, from shelving to wall decor. Additionally, their versatility allows use in multiple hollow wall types without causing excessive damage to the wall structure, as they distribute weight effectively.
Disadvantages
Despite their advantages, spring toggles come with notable drawbacks that may affect their suitability for certain tasks. They require drilling holes, which may not align with some homeowners’ preferences, particularly in rented spaces. Furthermore, their security is not always guaranteed for heavier items, especially if over-tightened, leading to potential breakage. The limited weight capacity compared to heavy-duty alternatives means you must carefully consider what items you intend to mount.
Additionally, using spring toggles can damage your plasterboard when removing them, leaving unsightly holes or requiring repairs. If the toggle is not properly aligned or installed, it may fail to provide the necessary support, risking the item’s integrity. Special care is needed in crowded wall spaces, as navigating around other fixtures can complicate installation. Ensure you weigh these factors against your needs before opting for spring toggles.
Maintenance and Troubleshooting
Maintaining your spring toggles requires routine checks to ensure their integrity and security over time. Regularly inspect the fixed items for any signs of sagging or looseness, as these may indicate potential failure. If you observe any discrepancies, address them immediately to avoid damaging your walls or risking the safety of the mounted items.
Regular Checks
Schedule periodic assessments of your wall fixings every six months. Look for any visible signs of wear or damage, such as cracks or rust on the toggles. Additionally, ensure that no excessive stress is placed on mounted items, as this can compromise the fixings and lead to failure.
Repairing or Replacing Toggles
Should you find a toggle that appears compromised, act swiftly to repair or replace it. If the toggle has loosened but remains undamaged, you might be able to simply reinsert it for a firmer grip. For those that are broken or stripped, removing the old toggle and replacing it with a new one is necessary to maintain safety and support.
To replace a toggle, start by removing the damaged one and cleaning the hole in the plasterboard. You can then insert a new toggle into the hole according to the manufacturer’s instructions. Ensure it expands fully behind the wall for a secure hold. If necessary, use a new anchor size to match the weight of the items you wish to mount, adhering to weight guidelines to ensure safety and reliability over time.
Summing up
From above, installing heavy items using spring toggles for hollow wall plasterboard requires careful planning and execution. You should ensure the correct type of fixing is utilised for your specific wall conditions, as this will determine the stability and security of your installation. By following a reliable guide, like How To Install Toggle Bolts – Step-by-Step, you can achieve a professional finish and peace of mind that your items are securely mounted.
FAQ
Q: What are spring toggles and why are they used for heavy items?
A: Spring toggles are specialised fixing devices designed for use in hollow walls, such as plasterboard. They consist of a spring-loaded mechanism that expands once inserted into the wall, providing a secure anchor for hanging heavy items like shelves, mirrors, or televisions.
Q: How do I install a spring toggle?
A: To install a spring toggle, first, drill a hole in the plasterboard that matches the toggle size. Fold the toggle and insert it through the hole. Once inside, allow it to spring open against the back of the wall. Pull the screw through the item being hung and tighten it to secure the toggle in place.
Q: What weight can spring toggles support?
A: The weight capacity of spring toggles varies based on size and wall type, but most can support between 15 to 30 kg when properly installed in plasterboard. Always refer to the manufacturer’s specifications for precise limits.
Q: Are there any specific tools required for installation?
A: The basic tools required for installing spring toggles include a power drill with appropriate drill bits, a screwdriver, and a level to ensure items are hung straight. Additionally, a stud finder may be useful to avoid drilling into existing pipes or wires.
Q: Can spring toggles be reused if I remove the item?
A: Spring toggles are typically not designed for reuse once removed. The expansion mechanism may weaken after installation, making them less effective if reinserted. It is advisable to replace them with new toggles for optimal safety and security when reinstalling items.