This guide will help you to securely fix plasterboard in your home, ensuring a robust and lasting finish. By following these best practices and using the right products, you can avoid issues such as wall instability and potential hazards. You’ll learn about the tools you need and the steps to take for a professional outcome. Achieving a smooth, durable surface enhances both safety and aesthetics in your living space, making it imperative for every DIY enthusiast.
Key Takeaways:
- Use appropriate fixings such as self-drilling screws or plasterboard plugs to ensure a firm hold.
- Ensure that the plasterboard is properly supported at the edges and joints to prevent cracking.
- Select suitable adhesive products for seamless installation and optimal strength.
Understanding Plasterboard
Plasterboard, commonly known as drywall or gypsum board, is a widely used building material in modern construction. It’s composed of a heavy paper lining encasing a core of gypsum plaster, offering a lightweight yet robust option for creating interior walls and ceilings. The ease of installation and finishing makes it a popular choice for both DIY enthusiasts and professional builders alike.
What is Plasterboard?
Plasterboard is a flat panel made from gypsum plaster sandwiched between two sheets of heavy paper. This versatile material is utilised in various applications, including wall and ceiling construction, providing a smooth surface that can be painted or decorated. Its ability to absorb sound and provide thermal insulation contributes to its suitability for residential and commercial properties.
Common Issues with Plasterboard
Various challenges can arise when working with plasterboard, including cracks, bulging, and water damage. These issues often stem from improper installation, insufficient support, or exposure to moisture. Understanding these problems will help you maintain the integrity of your plasterboard installations and ensure a long-lasting finish.
Cracks may develop due to thermal expansion or shifts in the building structure, while bulging can occur if the plasterboard is incorrectly secured to the framing. Water damage is particularly concerning; in cases of leaks or high humidity, plasterboard can weaken, leading to mould growth and structural instability. Addressing these problems promptly through correct installation techniques and using moisture-resistant boards in vulnerable areas can protect your plasterboard from further deterioration.
How to Securely Fix Plasterboard
Achieving a secure plasterboard fix is imperative for a smooth and durable finish. A well-installed plasterboard not only enhances the aesthetic appeal of your interiors but also provides structural integrity and insulation. Selecting the right fasteners and methods based on the wall type greatly influences the longevity and stability of your installation.
Preparation and Tools Needed
Before starting, gather imperative materials to ensure a smooth installation process. You’ll require robust plasterboard sheets, screws or nails, a drill or screwdriver, a tape measure, a utility knife, and a straight edge. Additionally, protective gear, such as gloves and goggles, will safeguard you during the installation. Ensure your working area is clean and free from obstructions for optimal efficiency.
Step-by-Step Fixing Guide
Begin by measuring and cutting plasterboard to fit your space accurately. Secure the boards to the framework using appropriate screws for the type of wall. The screw should penetrate at least 10mm into the timber or metal frame for a stable hold. Maintain a consistent spacing of screws—usually every 30cm—to prevent flexing over time. Tap joints should be staggered to enhance support and prevent cracks.
Step-by-Step Fixing Guide Details
| Step | Description |
|---|---|
| Measure | Use a tape measure for precise dimensions, marking where the plasterboard will fit. |
| Cut | Apply a utility knife and straight edge to score the plasterboard before snapping it at the line. |
| Position | Hold the plasterboard against the frame, ensuring it is flush and level. |
| Fix | Drive screws at appropriate intervals, ensuring they are slightly recessed. |
| Finish | Apply jointing compound over the screws and seams, then sand smooth once dry. |
Specific attention during the fixing process ensures durability and enhances the overall appearance of your plastered walls. Additionally, aligning plasterboard edges and staggering joints promotes strength and prevents future cracking. A consistent screw pattern can also prevent the plasterboard from sagging. Employing these methods will provide you with a professional-quality finish, making the next stages, such as plastering or decorating, much simpler.
Additional Tips for Secure Fixing
| Tip | Description |
|---|---|
| Use Drywall Screws | Opt for coarse-thread drywall screws, which provide superior grip compared to standard screws. |
| Check for Obstructions | Before drilling, inspect for pipes or wiring to avoid damaging hidden installations. |
| Consider Soundproofing | For areas needing sound insulation, use additional layers of plasterboard or acoustic boards. |
Best Practices for Fixing Plasterboard
Properly fixing plasterboard involves following certain best practices to ensure stability and longevity. Begin by ensuring your framework is aligned and secure, using appropriate screws spaced adequately for maximum support. Always cut the plasterboard with precision to avoid breaking the edges and use an appropriate adhesive where necessary, particularly on ceiling installations. Check for level after fixing each panel, and if you opt for joint tape, apply it correctly to prevent cracks over time. The integrity of your plasterboard installation relies heavily on these best practices.
Tips for Achieving a Smooth Finish
To achieve a smooth finish on your plasterboard, patience and technique are key. First, ensure your boards are fitted tightly together, then use a joint compound applied with a broad knife to fill any gaps. Sand the dried compound using a fine-grade sandpaper, maintaining a light touch to avoid damaging the surface. Regularly check your progress and keep your tools clean to avoid texture discrepancies. Using a mist coat (a diluted emulsion paint) before final finishing can also enhance the overall result. Recognising the importance of these factors will significantly impact your end finish.
Common Mistakes to Avoid
Avoiding common mistakes is important to a successful plasterboard installation. Among the frequent errors are insufficient screw spacing, which can lead to weak joints and structural issues. Inadequate sanding can leave visible imperfections on the surface, while neglecting to use joint tape can result in cracking seams. Additionally, failing to check for level during the installation may compound issues down the line. Your attention to these details at the outset can save considerable time and effort in repairs later.
When working with plasterboard, many overlook the significance of using the correct type of screws. Using screws that are too short can compromise the hold and lead to deployment failures. Furthermore, avoid rushing the drying process of joint compounds; patience is key to preventing unsightly bubbles or cracks. Always ensure your working environment is clean and free from dust, as this can hinder adhesion and finishing tasks. Recognising these pitfalls allows for a smoother experience and a professional-quality finish.
Recommended Products for Plasterboard Repair
Choosing the right products for plasterboard repair can significantly impact the quality of your work. Look for reliable brands that offer high-performance materials specifically designed for plasterboard applications. Products such as moisture-resistant plasterboard, jointing compounds, and powder fillers from reputable manufacturers like British Gypsum or Knauf provide excellent solutions. Additionally, consider investing in pre-mixed compounds for ease of use and consistent results, ensuring that you achieve a professional finish without the hassle of mixing.
Adhesives and Sealants
Top-quality adhesives and sealants are necessary for ensuring a strong bond when fixing plasterboard. Formulations like acrylic or polyurethane adhesives provide exceptional strength on various surfaces. When sealing joints, use the best caulking products, which effectively prevent moisture intrusion and promote a durable, long-lasting finish. Choosing waterproof sealants is advisable for areas exposed to humidity, such as bathrooms and kitchens.
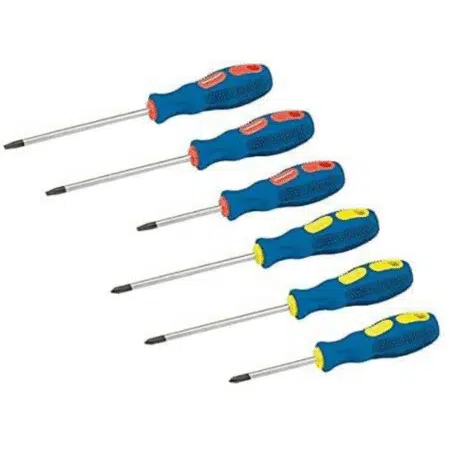
Tools and Accessories
Utilising the right tools and accessories streamlines the plasterboard installation process. A high-quality plasterboard knife, spirit level, and sanding block will ensure accuracy and precision in your work. Additionally, invest in a quality drill and screws specifically designed for plasterboard, as these will solidify your fix. A drywall saw can be beneficial for making customised cuts, whilst safety gear, like goggles and masks, will protect you during the job. When installing spring toggles in plasterboard, it’s crucial to mark the position accurately to ensure a secure fit. Make sure to drill the appropriate size hole for the toggle, allowing it to expand properly behind the board. This technique will enhance the strength of your fixtures, making them suitable for heavier items.
Your toolkit for plasterboard repair should include several necessary items for a smooth and effective repair process. Alongside the plasterboard knife and spirit level, a drywall lift can greatly reduce physical strain when handling large sheets. For subtle finishing touches, a corner trowel aids in achieving clean angles, while a jointing knife allows for seamless compound application. The right tools not only enhance your workmanship but also increase efficiency, leading to a superior final outcome that meets or exceeds your expectations. When embarking on a plasterboard installation project, knowing the best plasterboard installation tools and techniques is essential for achieving professional results. Understanding how to utilize each tool effectively can simplify the installation process and minimize errors. Additionally, staying informed about the latest innovations in plasterboard installation can further enhance your overall efficiency and quality of work.
Factors to Consider When Fixing Plasterboard
Before launching on a plasterboard fixing project, various factors must be considered to ensure a successful outcome. These include the type of damage, the environmental conditions, and the tools and materials you plan to use. Understanding these elements will shape your approach and enhance the longevity of your repairs. After assessing each factor, you can strategically proceed with the best practices and products to achieve a professional finish. One key aspect to consider is the benefits of unifix boardmaster fixings, which are designed for versatility and strength in various applications. These fixings provide excellent holding power while minimizing damage to plasterboard surfaces, making them an ideal choice for both professionals and DIY enthusiasts. Additionally, their ease of installation can significantly reduce project time and enhance overall efficiency.
- type of damage
- environmental conditions
- tools and materials
Type of Damage
The type of damage to your plasterboard is fundamental in determining the appropriate repair method. Small dents and dings may only require a light filler, while larger holes necessitate a more robust approach, such as patching with a new piece of plasterboard. You should assess the extent of the damage before selecting your materials, ensuring a reliable and durable repair.
Environmental Conditions
Environmental conditions can significantly affect the adhesion and curing of plasterboard repairs. High humidity can delay drying times and compromise the repair’s integrity, while excessively dry environments may lead to rapid shrinkage and cracking. Ensuring your working area maintains a temperature of around 10 to 25 degrees Celsius and consistent humidity levels will aid in achieving optimal results.
Consider utilising a dehumidifier or heater to manage moisture and temperature if the conditions are less than ideal. A humidity level above 60% may require a delay in undertaking repairs, as moisture can lead to poor adhesion or even mould growth behind the plasterboard. You should monitor these factors closely for an effective long-lasting fix.
Maintenance Tips for Plasterboard
To ensure the longevity and integrity of your plasterboard, incorporating regular maintenance is key. This includes conducting routine checks for any issues and addressing them promptly. Essential practices involve keeping the surface clean, avoiding excessive moisture, and properly sealing joints. Products such as sealants and paints can enhance durability. Any neglect could lead to costly repairs down the line.
Regular Inspections
Conducting regular inspections of your plasterboard can help identify potential problems before they escalate. Look for cracks, sagging, or discolouration, as various factors, including moisture and structural shifts, can affect plasterboard. Checking at least twice a year, or more frequently in high-moisture areas, will keep your walls in optimal condition.
Signs of Wear and Tear
Recognising signs of wear and tear is important for timely repairs. Look for visible damage such as cracks, holes, or moisture stains, which indicate deeper issues that may require immediate attention. Even small imperfections, if left untreated, can evolve into larger concerns impacting the structural integrity of your walls.
Small cracks may start as minor annoyances but can quickly worsen due to environmental factors or stress on the framework. Pay attention to bulging areas or leaks, particularly in kitchens and bathrooms where moisture is prevalent. Additionally, persistent discolouration often signals moisture damage, which can lead to mould growth. Address all visible issues as they arise to maintain the robust condition of your plasterboard surfaces.
Final Words
Drawing together the best practices and products for securely fixing plasterboard, you should ensure the use of suitable fixings, such as self-drilling screws or nails designed for plasterboard installation. Apply adhesive where necessary for added strength, and always check that your supports are adequately anchored. By following these guidelines, you can achieve a robust, long-lasting plasterboard installation that will stand the test of time in your home or project.
FAQ
Q: What materials are best for fixing plasterboard securely?
A: The best materials for securely fixing plasterboard include self-tapping screws specifically designed for plasterboard, which provide a strong bond. Additionally, use a reliable adhesive, such as a good-quality construction adhesive, to enhance the hold between the plasterboard and its supports.
Q: How far apart should plasterboard screws be placed?
A: Plasterboard screws should typically be placed at intervals of 30 cm (12 inches) along the edges and every 40 cm (16 inches) in the field (the main area of the board). This spacing ensures optimal support and reduces the risk of sagging.
Q: Is it necessary to tape the joints of plasterboard?
A: Yes, it is necessary to tape the joints of plasterboard to prevent cracking and provide additional strength. Using either paper or fibreglass tape, along with a joint compound, will ensure a smooth and durable finish.
Q: What is the best way to finish plasterboard for a smooth surface?
A: To achieve a smooth surface on plasterboard, apply multiple thin layers of joint compound, allowing each layer to dry completely before sanding lightly. Using a wide taping knife can help create an even finish, and a final sanding with fine-grit sandpaper will produce a seamless look.
Q: How can I ensure my plasterboard is moisture-resistant?
A: To make plasterboard moisture-resistant, opt for green board or moisture-resistant plasterboard when installing in areas prone to dampness, such as bathrooms. Additionally, apply a waterproof sealant or primer over the surface before painting to further protect against moisture damage.