Most DIY enthusiasts encounter challenges when working with concrete, but with the right knowledge, you can achieve impressive results. This step-by-step guide will equip you with necessary skills for using concrete masonry screws effectively, ensuring that your projects are secure and long-lasting. By following these detailed instructions, you will discover the best practices for choosing the right screws, preparing your materials, and executing your work safely. Let’s commence on this journey together, ensuring your next task is not only successful but also safe.
Key Takeaways:
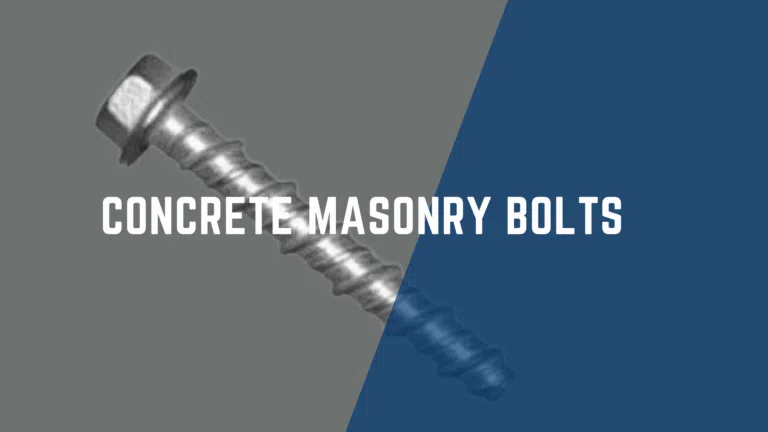
- Concrete masonry screws are designed for direct attachment to concrete and masonry materials, providing a strong and durable fastening solution.
- Proper installation involves pre-drilling a pilot hole, ensuring the correct depth and diameter to match the screw specifications for maximum grip.
- Utilising the correct type of masonry screw and drill bit is vital for achieving optimal performance and minimising damage to the concrete or masonry surface.
 The Anatomy of Concrete Masonry Screws
 The Anatomy of Concrete Masonry Screws
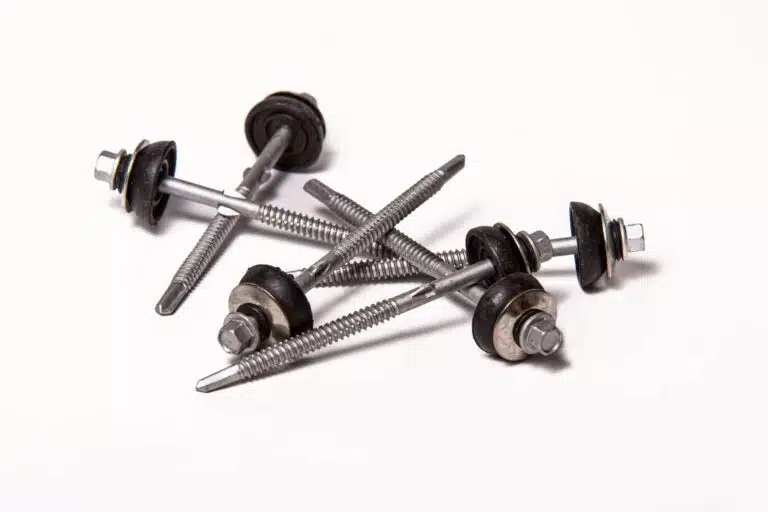
Understanding the anatomy of concrete masonry screws is imperative for effective use and installation. These screws are specifically engineered to secure materials like concrete and masonry, featuring a unique design that differentiates them from standard screws. They usually incorporate a self-tapping tip, spiral threads, and a robust head to ensure a secure fit and adequate grip in harsh environments.
Differentiating Characteristics Compared to Regular Screws
Characteristics of Concrete Masonry Screws
| Tip Design | Self-tapping, allowing for easy penetration of hardened surfaces. |
| Thread Type | Coarse, providing better hold in masonry and reducing the risk of stripping. |
| Material | Often made of hardened steel or similar materials for increased strength and durability. |
Material Composition and Its Significance
The material composition of concrete masonry screws significantly affects their performance. Typically made from high-strength steel, this composition ensures enhanced durability and resistance to breaking or bending under load. Additionally, many screws are coated with protective finishes to resist corrosion, elevating their longevity in exterior applications.
High-strength steel not only provides the necessary toughness but also allows for a tighter grip in dense materials like concrete. For instance, a commonly used grade of these screws, like Grade 5 steel, offers a tensile strength of about 120,000 PSI, making it suitable for a variety of construction projects. Corrosion-resistant coatings, such as galvanisation, further extend the lifespan of these anchors, making them imperative for outdoor or damp environments. This combination of material composition and protective features ensures that you can rely on concrete masonry screws for secure and lasting installations.
Tools and Preparation: Setting the Stage for Success
Before stepping into your concrete masonry project, setting the stage with the right tools and preparation is key to achieving flawless results. A well-organised workspace and having everything you need within arm’s reach will streamline your process, ensuring that you can focus on the task at hand rather than searching for tools or materials halfway through. This section will guide you through necessary tools and offer practical tips for preparing your environment effectively.
Essential Tools for the Job
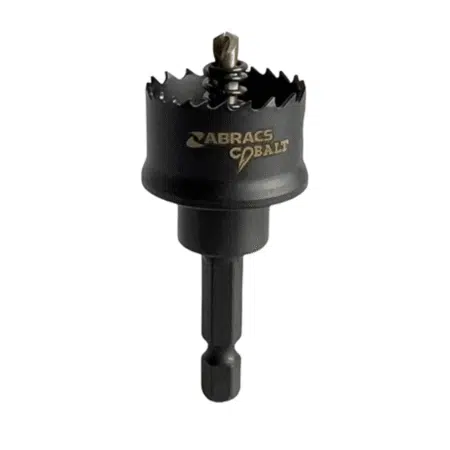
A well-equipped toolkit is necessary for working with concrete masonry screws. Ensure you have a power drill equipped with a masonry bit, screwdriver or a power screwdriver, a hammer for any necessary adjustments, a level to guarantee precision, and personal protective equipment like gloves and safety glasses. Additionally, a tape measure and pencil will help in marking your measurements accurately.
 Preparing Your Workspace and Materials
 Preparing Your Workspace and Materials
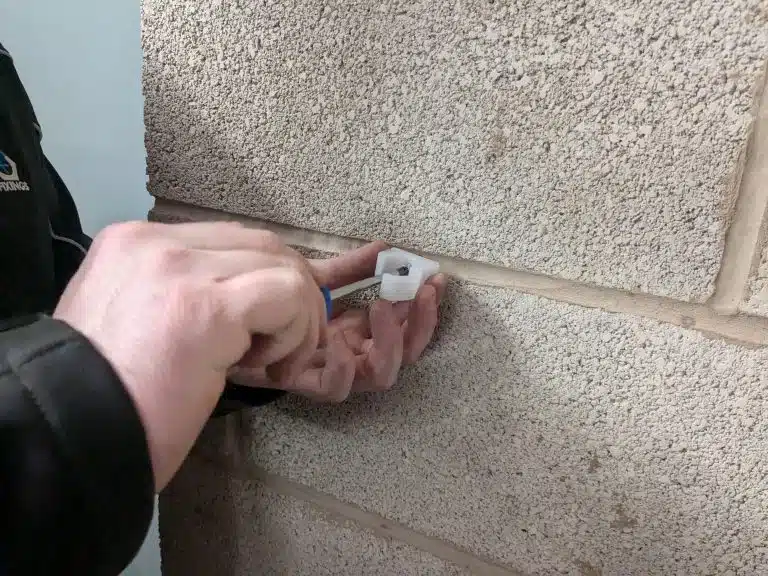
Your workspace should be clean, well-lit, and spacious enough to accommodate both the materials and your movements. Lay out all the tools you’ll require and ensure the area is free of clutter to increase efficiency while working. Secure the concrete surface you’ll be fastening to, and gather all necessary screws and anchors to avoid interruptions during the project.
To set up your workspace, choose a flat surface where you can easily manoeuvre around. Clear away any debris and unwanted materials to minimise potential hazards. Store your tools in a way that they’re easily reachable; a toolbox or a sturdy workshop bench would be ideal. Lastly, check the weather conditions as working outdoors can impact your project, especially if rain or strong winds are on the horizon. Ensuring that everything is tidy and prepared before starting allows you to concentrate on the task, leading to high-quality results with your concrete masonry screws.
Mastering the Installation Process Step by Step
Successfully installing concrete masonry screws involves a precise method that enhances durability and performance. Start by assembling the right tools and materials, including masonry screws, a hammer drill, and appropriate drill bits. Follow each step diligently—from pre-drilling holes to ensuring correct depth and angle. This guide is designed to walk you through the process, ensuring that your installations are both secure and efficient, achieving the best possible results.
The Pre-Drilling Technique: Why It Matters
A pre-drilling technique is vital for optimising the performance of concrete masonry screws. By creating a pilot hole with the correct diameter and depth, you reduce the risk of concrete damage and guarantee a proper fit for your screws. This technique allows for greater control during installation, ensuring the screw bites into the surrounding material effectively and avoids unnecessary stress on both the screw and the surrounding masonry.
Proper Screw Placement for Maximum Strength
Correct screw placement plays a vital role in achieving maximum strength and load-bearing capacity. Place screws at least 8 to 10 inches apart to distribute weight evenly across the surface. Additionally, maintain a distance of at least 2 to 3 inches from the edges of the masonry to prevent cracking or breaking. This strategic placement not only enhances strength but also prolongs the lifespan of your installed structures.
The positioning of your concrete screws can significantly affect the longevity and stability of the installation. For projects requiring heavy loads, like shelving or anchors, consider using multiple screws in the same area to create a stronger hold. Analysis of load distribution will show that screws fixed at various angles can also enhance grip and resist lateral movements. If unsure about screw placement, consult with a masonry expert, as proper alignment can eliminate potential failures under stress.
 Troubleshooting Common Installation Pitfalls
 Troubleshooting Common Installation Pitfalls
Even with careful planning, you may encounter installation pitfalls that can compromise the effectiveness of your concrete masonry screws. Recognising these issues early on will save you time and unnecessary effort down the line. Pay close attention to the fastening process, as improper installation can lead to inadequate holds or damage to the surrounding material.
Recognising Issues During Installation
Common signs of problems include excessive resistance during drilling, misalignment of screws, or the screw not sinking into the concrete as expected. If you notice these red flags, assess your tools and technique immediately to avoid greater complications. An improper pilot hole or using the wrong screw type can greatly impact the outcome.
Solutions to Frequent Problems
Many installation hiccups can be remedied with simple adjustments. If your drill is struggling, check the drill bit and ensure it’s sharp and suitable for concrete. Misalignment can often be corrected by re-evaluating your marking and measuring techniques, while the wrong screw size can be resolved by selecting a more appropriate option based on your specific project needs.
Your first approach when troubleshooting issues should always involve reassessing the tools and materials at your disposal. For instance, if you’re facing difficulties with drilling, switching to a masonry bit that matches your screw’s diameter can significantly improve performance. Moreover, misalignment issues may call for a second look at your initial markings; utilising a level and a square can enhance precision. Choose the correct length and diameter of screw as these factors will determine the grip strength and overall success of the installation. Ultimately, being aware of potential pitfalls and knowing how to fix them can make a significant difference in the longevity of your construction work.
The Aftermath: Securing and Maintaining Your Work
After completing your installation, securing and maintaining your work is vital for ensuring structural integrity. Regular inspections and a few important maintenance practices will prolong the life of your installation and maintain safety standards. Implementing these steps will not only safeguard your project but also save you time and money in the long run.
Checking for Stability and Safety
Assessing the stability of your installation can prevent future issues. Regularly inspect the screws for any signs of loosening or corrosion, especially in outdoor environments. Gently tugging on installed fixtures will help ensure that they are securely anchored. Pay close attention to any visible cracks in the surrounding concrete, as they may indicate underlying problems that require your immediate attention.
Maintenance Tips for Longevity
Prolonging the life of your concrete masonry screws is achievable with simple maintenance tips. Clean the surfaces around the screws regularly to avoid build-up of debris, and check the seals to ensure their integrity. A periodic application of protective coatings can also help guard against moisture and wear. This will ensure your installation remains both effective and safe!
- cleaning the surfaces around screws
- check seals for integrity
- apply protective coatings periodically
- ensure installation is effective and safe
Utilising proper cleaning techniques enhances aesthetics and functionality. For instance, using a wire brush to remove rust and a degreaser for oil are effective methods. Applying a suitable sealant after cleaning can prevent moisture infiltration, keeping screws secure and free from corrosion. Knowing these simple steps ensures longevity in your installations, reducing the likelihood of costly repairs down the line.
- use a wire brush for rust removal
- employ a degreaser for oil
- apply a sealant post-cleaning
- reducing the likelihood of repairs down the line
Summing up
Upon reflecting on the ‘Concrete Masonry Screws Tutorial – Step by Step Guide’, you now have the vital knowledge to effectively utilise concrete masonry screws in your projects. By following the outlined steps, you can ensure secure and lasting installations in various materials. With practice, your skills will improve, allowing you to tackle larger and more complex tasks confidently. Embrace the versatility of concrete masonry screws to enhance your construction capabilities and achieve professional results in your work.
FAQ
Q: What materials do I need for installing concrete masonry screws?
A: To install concrete masonry screws, you will need the following materials: concrete masonry screws, a drill with a hammer function, a masonry bit (sized according to the screw specifications), a screwdriver bit that fits the screw head, and a vacuum or brush to clear debris. Safety gear, such as goggles and gloves, is also advisable to protect yourself during the process.
Q: How do I choose the right size of concrete masonry screws?
A: Choosing the right size of concrete masonry screws depends on the thickness of the material you are fastening and the load it will bear. Generally, you should select a screw length that is at least one inch longer than the thickness of the item being fixed to the concrete. Consulting the manufacturer’s specifications for load ratings can provide further guidance on the appropriate size for your specific application.
Q: What is the proper technique for drilling into concrete before installing the screws?
A: The proper technique for drilling into concrete starts with marking the drill points accurately. Use a masonry bit and set your drill to the hammer function to penetrate the concrete effectively. Drill at a slow, steady pace, applying even pressure without forcing the drill. It’s advisable to periodically withdraw the bit to clear debris and prevent overheating. Ensure you drill to the required depth for the speed of your installation.
Q: Are there any specific safety precautions to take when using concrete masonry screws?
A: Yes, several safety precautions should be observed when using concrete masonry screws. Always wear safety goggles to protect your eyes from concrete dust and debris. Use hearing protection if you are working in a particularly loud environment. Additionally, ensure that your workspace is free of obstructions and that your drill is in good working order, as faulty equipment can pose risks during use. It is also advisable to work in a well-ventilated area to avoid inhaling dust.
Q: How can I ensure that my concrete masonry screws are securely fastened?
A: To ensure that your concrete masonry screws are securely fastened, it is important to drive them into the pre-drilled holes until they are snug. Avoid overtightening, as this can strip the hole or damage the screw. A reliable way to check for security is to gently tug on the secured item to see if it remains stable. If there is any wobbling, you may need to adjust the screw or consider additional fasteners for larger loads.