Gluing wood outdoors can lead to effective results if you avoid a few common pitfalls. Ensure you select the right adhesive that is suitable for outdoor conditions, as not all glues can withstand moisture and temperature changes. Prepare your surfaces thoroughly by cleaning and sanding them, which enhances adhesion. Additionally, control the environment during application to prevent premature setting. By steering clear of these errors, you can achieve a durable and lasting bond that resists the elements.
Key Takeaways:
- Ensure the wood surfaces are clean and dry before applying glue to achieve optimal adhesion.
- Select a glue specifically designed for outdoor use to withstand weather conditions and prevent failure.
- Allow sufficient curing time as per the manufacturer’s instructions, even if the glue appears to hold initially.
 Understanding Outdoor Wood Glue
 Understanding Outdoor Wood Glue
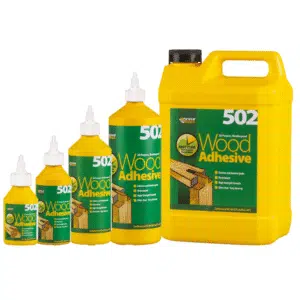
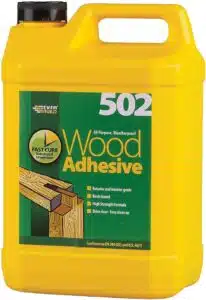
Outdoor wood glue is specifically formulated to withstand the elements, offering superior bonding strength for exterior projects. These adhesives contain additives that enhance water resistance and durability, making them suitable for varying climates. By understanding the properties of outdoor wood glue, you can ensure a more reliable, long-lasting bond for your woodworking tasks.
Types of Adhesives
In terms of outdoor wood glue, several types are available, each serving distinct purposes:
- PVA glue – a popular choice for its ease of use
- Polyurethane glue – provides excellent water resistance
- Epoxy – ideal for structural repairs
- Construction adhesive – suitable for heavy-duty applications
- Hide glue – offers a traditional bonding method
Thou should select the right adhesive based on the project requirements and environmental conditions.
| Type of Adhesive | Usability |
| PVA glue | Easy to apply, dries clear |
| Polyurethane glue | Expands as it cures, strong bond |
| Epoxy | Perfect for challenging repairs |
| Construction adhesive | Used in heavy-duty projects |
Environmental Considerations
Using outdoor wood glue necessitates consideration of environmental factors. Certain adhesives release volatile organic compounds (VOCs) that can adversely affect air quality. It’s advisable to select products labelled as low-VOC or eco-friendly, ensuring minimal environmental impact while still achieving robust adhesion.
Choosing adhesives with lower VOC levels not only benefits the environment but also creates a safer workspace for you. Look for brands that comply with environmental regulations; many offer biodegradable or non-toxic options. By opting for these products, you contribute positively to the ecosystem, making your woodworking projects more sustainable. Thou can enhance both your projects and your environmental footprint with thoughtful adhesive selection.
Surface Preparation
Effective surface preparation is imperative for achieving a strong bond with outdoor wood glue. Before applying the adhesive, ensuring that the surfaces are clean and smooth will significantly enhance adhesion and durability.
Cleaning the Wood
Prior to gluing, it’s vital to remove any dirt, dust or grease from the wood surfaces. Use a damp cloth or mild detergent to wipe away any contaminants, as these can interfere with the bond and lead to failures over time.
Properly Sanding Surfaces
Sanding the surfaces is a fundamental step in the preparation process. It not only creates a better texture for adhesion but also eliminates any imperfections that could weaken the joint. Fine-grit sandpaper is best, as it smooths the wood without causing rough spots that can trap glue or moisture.
When sanding, focus on areas where the glue will be applied; ensure that you create a consistent and even finish. This means starting with a coarser grit to eliminate old finishes or rough patches, then progressing to a finer grit for smoothness. Always sand in the direction of the grain to avoid damage. After sanding, wipe the surfaces again with a clean, damp cloth to remove any dust generated during the sanding process, ensuring a clean surface for optimal glue adhesion.
Temperature and Humidity Factors
When gluing wood outdoors, temperature and humidity play vital roles in the adhesion process. Ideally, the temperature should be between 10°C to 30°C, while humidity levels should be low, ideally between 30% and 50%. High humidity can introduce moisture that compromises the bond, while extreme heat can cause the adhesive to cure too quickly. Assure that you check the weather conditions before proceeding.
- Ideal Temperature: 10°C to 30°C
- Optimal Humidity: 30% to 50%
- High Humidity Risks: Compromised bonds
- Extreme Heat Risks: Quick curing of adhesives
Conditions Overview
| Factor | Impact on Glue |
|---|---|
| Low Temperature | Increases curing time |
| High Temperature | Accelerates moisture loss |
| High Humidity | Risk of glue failure |
| Low Humidity | Encourages better adhesion |
 Ideal Conditions for Gluing
 Ideal Conditions for Gluing
For optimal results, you should aim for conditions where both temperature and humidity align with recommended levels. This fosters the best environment for adhesive performance, ensuring a strong and durable bond. When conditions fall within these ranges, the glue cures effectively, creating a robust bond that lasts. Always assess the weather forecast before starting your project.
Effects of Weather on Adhesive Performance
Weather significantly affects adhesive performance; for instance, high humidity can weaken bonds, while low temperatures can impede curing. Additionally, if the glue dries too quickly due to hot conditions, it may result in an inadequate bond. Consequently, understanding these factors is vital for achieving a reliable and durable connection between wooden surfaces.
Weather impacts adhesive performance extensively. For example, exposure to continuous moisture can lead to adhesive breakdown, reducing the bond’s strength. In contrast, a very dry environment might cause rapid evaporation of the solvent in water-based adhesives, preventing proper adhesion. Always consider the specific conditions you are working in and adjust your methods or materials accordingly to maintain effective bonding.
Application Techniques
Utilising the correct application techniques is imperative for a successful outdoor wood glue project. Ensuring an even spread of adhesive across the surfaces maximises adhesion and minimizes the risk of weak spots. A brush or a roller can often deliver better control than squeezing directly from the bottle, allowing you to cover intricate areas without excess glue oozing out.
Amount of Glue to Use
Striking the right balance in the amount of glue is key. Over-application can lead to messy joints and excess squeeze-out, while under-application risks poor adhesion. Aim for a thin, continuous line or layer that can be evenly spread across the surface, resulting in a cleaner finish and a stronger bond.
Clamping and Positioning
The effectiveness of your glue bond heavily relies on correct clamping and positioning of the wood pieces. This ensures that the surfaces remain in contact while the adhesive cures, which is vital for optimal strength. Use clamps that apply even pressure and avoid shifting the wood once it’s set in place.
When clamping, aim to maintain consistent pressure across the entire joint. Using multiple clamps can distribute the force evenly, reducing the chances of warping. Be cautious of the wood’s grain direction as well; clamping against the grain can lead to misalignment or even damage. Ideally, leave the clamps in place for the time specified by the glue manufacturer to guarantee full strength, typically ranging from a few hours to overnight. Proper spacing between clamps will also prevent glue from seeping out uncontrollably, ensuring a tidy finish.
Curing Time and Process
Understanding the curing time and process is imperative when working with outdoor wood glue. Typically, this process takes at least 24 hours, although full bonding strength may not be achieved for up to 72 hours. Temperature, humidity, and the type of glue used can all impact setting times. Allow for adequate drying before applying stress to the joint to ensure a robust, long-lasting hold.
Importance of Patience
Exercising patience during curing is vital; rushing the process can lead to weak bonds and potential failures. In outdoor conditions, factors such as moisture and temperature fluctuations can further necessitate a longer curing time. Taking the time to allow your glued joints to set properly ultimately saves you from costly repairs down the line.
How to Monitor Curing
Monitoring the curing process is simple yet vital. You should check the bond intermittently and ensure it remains undisturbed during the curing period. When gluing, follow the manufacturer’s instructions regarding drying time and conditions. If uncertain, consider using a moisture meter to gauge the conditions surrounding the wood; this can help assess whether the environment is suitable for optimal curing.
To effectively monitor curing, observe the temperature and humidity around your project. High humidity can prolong curing times, while lower levels can speed them up. Regularly inspecting the bond will also provide insights; a slight tackiness indicates the glue is not fully cured. Using a time-lapse method to document the changes can help track progress, giving you a more visual understanding of how the curing stage evolves over time.
Common Errors and How to Avoid Them
 Common Errors and How to Avoid Them
When working with outdoor wood glue, specific mistakes can undermine the integrity of your project. Understanding these common errors helps ensure a lasting bond and safe working conditions. Awareness and proper technique are key to a successful outcome.
Misapplication of Glue
Applying too much or too little glue can lead to weak bonds or unsightly overflow. Ensure you apply an even, sufficient amount across the surfaces without excessive pooling. Use a brush or applicator for precise control, which helps achieve a reliable and strong adherence.
Neglecting Safety Precautions
Overlooking safety precautions can expose you to harmful fumes or skin irritations. Always ensure your workspace is well-ventilated and utilise protective gear, such as gloves and masks, to safeguard your health while handling adhesives.
Proper safety measures are crucial as many wood glues contain harmful chemicals that can cause allergic reactions or respiratory issues. Ventilation is paramount; aim for a well-ventilated area or use a fan to disperse fumes. Gloves protect your skin from irritation, while masks avert inhalation of vapours. Failing to prioritise these precautions could result in discomfort and long-term health risks, undermining the joy of your woodworking project.
Summing up
As a reminder, to achieve a strong bond when gluing wood outdoors, you should avoid common mistakes that can compromise your project. Ensure that the surfaces are clean and free from contaminants, choose the right adhesive suitable for outdoor conditions, and allow adequate curing time before exposing the joint to moisture. Additionally, avoid applying glue in overly humid or cold environments, as this can hinder adhesion. By being mindful of these factors, you can ensure a durable and effective wood bond in your outdoor projects.
FAQ
Q: What type of adhesive is best for outdoor wood projects?
A: Waterproof PVA glue, polyurethane glue, or epoxy are excellent choices for outdoor wood projects. These adhesives provide strong bonds and resist moisture effectively.
Q: How does temperature affect the gluing process outdoors?
A: Extreme temperatures can impact the adhesive’s performance. Ideally, glue should be applied in temperatures ranging from 10°C to 30°C (50°F to 86°F) for optimum bonding.
Q: What is the importance of surface preparation before gluing?
A: Proper surface preparation, including cleaning and sanding, is crucial to ensure a good bond. Contaminants like dirt or oils can prevent the adhesive from adhering properly.
Q: Is it necessary to clamp the wood when using glue outdoors?
A: Yes, clamping helps maintain pressure on the joint, ensuring a strong bond. It prevents gaps from forming as the adhesive cures, which is vital for structural integrity.
Q: How do I know when the glue is fully cured?
A: The curing time varies by adhesive type and environmental conditions. Typically, it can take anywhere from a few hours to several days. Always refer to the manufacturer’s instructions for specific guidance.